
If you’ve ever found yourself craving something sweet, crunchy, and coated in silky chocolate, then these Butterfinger Balls are about to become your next dessert obsession. They combine the irresistible flavors of peanut butter, chocolate, and the crispy crunch of Butterfinger candy bars into one perfect, bite-sized treat. Even better? They’re no-bake, easy to make, and taste just like something you’d find in a gourmet candy shop.
In this post, you’ll learn everything you need to know to make these Butterfinger Balls flawlessly every time—from ingredient details and step-by-step instructions to expert tips, variations, and storage hacks. Whether you’re a seasoned baker or a complete beginner, this recipe is approachable, fun, and guaranteed to wow your taste buds.
What Are Butterfinger Balls?
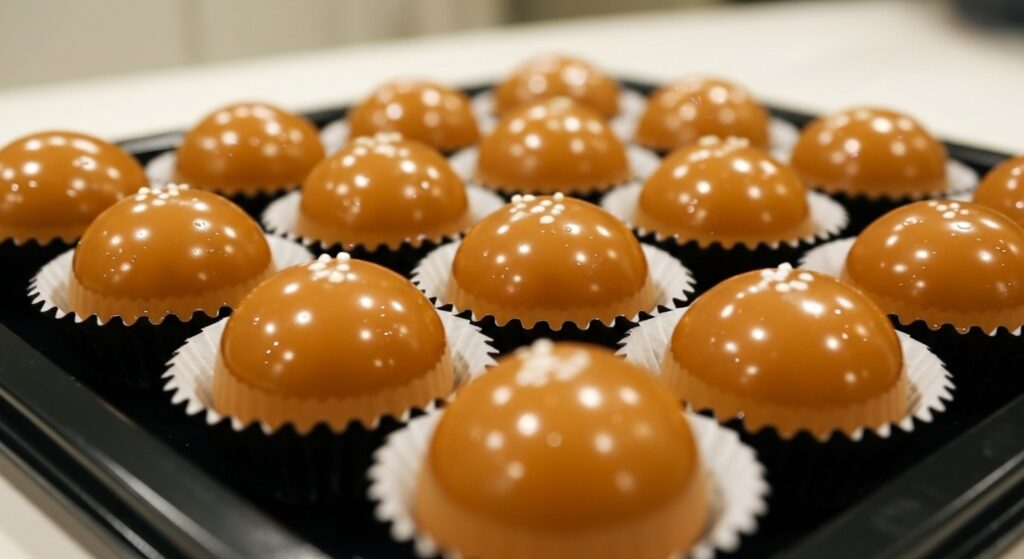
Butterfinger Balls are delicious, bite-sized dessert truffles made from a creamy peanut butter base, blended with crushed Butterfinger candy bars, powdered sugar, and butter, then rolled into small balls and dipped in melted chocolate. Think of them as a cross between a peanut butter ball and a Butterfinger candy bar—soft inside, crunchy bits throughout, and covered in smooth chocolate for the perfect finish.
They’re the perfect treat for holidays, parties, bake sales, or even as a quick snack when you want something sweet but don’t want to bake. Because they require no oven time, they’re ideal for summer treats or last-minute dessert cravings.
Why You’ll Love These Butterfinger Balls
- Quick and Easy: You only need a few ingredients and no special equipment.
- No Baking Required: Perfect for hot days or busy schedules.
- Kid-Friendly: Fun for kids to help roll or decorate.
- Freezer-Friendly: You can make them ahead and store them for weeks.
- Customizable: Easy to adjust the sweetness or texture based on your preferences.
Ingredients for Butterfinger Balls
Here’s everything you’ll need to make these dreamy, chocolate-dipped treats:
- 2 cups crushed Butterfinger candy bars (about 10 fun-size or 4 full-size bars)
- 1 cup creamy peanut butter
- 1 cup powdered sugar
- 4 tablespoons softened butter
- 2 cups semi-sweet chocolate chips
- 1 tablespoon shortening (optional for smoother dipping)
Tip: Make sure your butter is softened at room temperature for easier mixing. Using creamy peanut butter ensures a smooth texture, but crunchy peanut butter adds a fun, textured twist.
How to Make Butterfinger Balls
Follow these simple steps to make perfect Butterfinger Balls every time:
Step 1: Crush the Butterfingers
Start by crushing your Butterfinger candy bars into small pieces. You can use a food processor for a quick and even crush or place them in a zip-top bag and crush them with a rolling pin. Aim for small chunks—not a fine powder—so you get that signature crunch in every bite.
Step 2: Make the Filling
In a medium mixing bowl, combine the crushed Butterfingers, peanut butter, powdered sugar, and softened butter. Mix until fully blended. The mixture should be thick but pliable—similar to cookie dough. If it feels too soft, add a little more powdered sugar. If too dry, add a small spoonful of peanut butter.
Step 3: Shape the Balls
Using your hands or a small cookie scoop, roll the mixture into 1-inch balls. Place each one on a parchment-lined baking sheet. This recipe usually makes about 24–30 balls depending on size.
Step 4: Chill the Balls
Place the tray in the freezer for 30 minutes, or until the balls are firm. This step is crucial because it keeps them from falling apart during the chocolate-dipping process.
Step 5: Melt the Chocolate
In a microwave-safe bowl, combine the chocolate chips and shortening (if using). Microwave in 30-second intervals, stirring after each until the mixture is fully melted and smooth. Be careful not to overheat—the chocolate should be glossy and pourable.
Step 6: Dip the Balls
Remove the chilled balls from the freezer. Using a fork or toothpick, dip each ball into the melted chocolate, coating it completely. Let any excess chocolate drip off, then return the coated ball to the parchment-lined tray.
Step 7: Set the Chocolate
Once all the balls are coated, refrigerate them for 15–20 minutes or until the chocolate hardens. Store in an airtight container once set.
Tips for Perfect Butterfinger Balls
- Use quality chocolate: The better your chocolate, the richer your flavor will be.
- Work in batches: Keep half the balls in the freezer while dipping the others so they don’t soften too much.
- Add toppings: Drizzle with white chocolate, sprinkle crushed Butterfingers, or dust with cocoa powder for a professional touch.
- Keep them cool: These treats are best stored in the fridge or freezer to maintain their texture.
Storage Instructions
Refrigerator:
Store the Butterfinger Balls in an airtight container in the refrigerator for up to two weeks. Separate layers with parchment paper to prevent sticking.
Freezer:
Freeze the Butterfinger Balls for up to three months. To thaw, simply transfer them to the refrigerator for a few hours before serving.
Butterfinger Ball Variations
Once you’ve mastered the basic recipe, try some fun twists!
- White Chocolate Coating: Use melted white chocolate instead of semi-sweet for a creamy contrast.
- Dark Chocolate Butterfinger Balls: Perfect for those who love a slightly bitter edge to balance the sweetness.
- Oreo Butterfinger Balls: Add crushed Oreos for a cookies-and-cream surprise.
- Holiday Version: Top with colored sprinkles for Christmas, Valentine’s Day, or Easter.
- Peanut-Free Option: Replace peanut butter with cookie butter or sunflower seed butter for an allergy-friendly version.
Serving Ideas
Butterfinger Balls are incredibly versatile! Here are some creative ways to serve them:
- Dessert boards: Add them to a charcuterie-style dessert board alongside truffles, cookies, and chocolate-covered pretzels.
- Gift boxes: Package them in mini cupcake liners inside decorative tins or mason jars for homemade gifts.
- Party platters: Arrange them on a platter with drizzled chocolate for an elegant dessert table centerpiece.
- On ice cream: Crumble a few over vanilla ice cream or milkshakes for an extra indulgent touch.
Butterfinger Balls for the Holidays
These little bites are perfect for holiday baking and gifting. They look festive, taste amazing, and require minimal effort—so you can make large batches without stress. For Christmas, drizzle them with red and green candy melts. For Halloween, add orange sprinkles. For Valentine’s Day, use pink chocolate drizzle and heart-shaped sprinkles. Every occasion becomes sweeter with Butterfinger Balls!
Frequently Asked Questions
Can I use natural peanut butter?
You can, but it may make the filling too oily or loose. If using natural peanut butter, stir it well first and add a bit more powdered sugar to stiffen the mixture.
What if I don’t have Butterfinger bars?
You can substitute with other crunchy candy bars like Crunch, Reese’s Sticks, or even Kit Kats. Each variation offers a slightly different flavor and texture.
Can I make these dairy-free?
Yes! Use dairy-free butter and dairy-free chocolate chips. The texture and taste remain delicious.
How far in advance can I make these?
They last up to 2 weeks in the fridge and 3 months in the freezer, so you can make them well ahead of time for holidays or parties.
Do Butterfinger Balls melt easily?
They can soften if left out in warm temperatures for too long. Keep them chilled until serving.
Expert Tips for Pinterest and Blogging Success
If you’re sharing your Butterfinger Balls on your food blog or Pinterest, here are some pro blogging tips to help your post rank and perform well:
- Use vertical images: 1000×1500 px works best for Pinterest pins.
- Show texture: Cut a Butterfinger Ball in half for that drool-worthy interior shot.
- Include keywords naturally: Use phrases like “easy no-bake dessert,” “chocolate peanut butter truffles,” and “Butterfinger candy recipes.”
- Write a strong headline: Example: “Easy No-Bake Butterfinger Balls – Only 6 Ingredients!”
- Engage your audience: Ask readers questions like “Have you tried making candy truffles before?” to boost comments and engagement.
Nutrition Facts (Per Serving)
- Calories: ~150
- Fat: 9g
- Carbohydrates: 15g
- Protein: 2g
- Sugar: 12g
Note: Nutrition values are approximate and depend on exact ingredient brands and portion size.
Make-Ahead Tips
- Make the peanut butter mixture up to 2 days ahead and store in the refrigerator before rolling.
- Freeze undipped balls for up to 3 months. When ready, dip them in melted chocolate for fresh coating.
- Store finished Butterfinger Balls in a sealed container with parchment between layers to keep them looking perfect.
Best Occasions to Serve Butterfinger Balls
- Holiday parties
- Office potlucks
- Birthday celebrations
- Baby showers
- Game nights
- Valentine’s Day treats
- Edible gifts
Common Mistakes to Avoid
- Skipping the chilling step: The filling will fall apart when dipped if not firm enough.
- Overheating chocolate: Melt it slowly and stir often to avoid burning.
- Too much powdered sugar: It can make the filling crumbly instead of smooth.
- Not storing properly: Always refrigerate or freeze for best freshness and texture.
Printable Recipe
Butterfinger Balls Recipe
- Prep Time: 20 minutes
- Chill Time: 30 minutes
- Total Time: 50 minutes
- Servings: 24–30 balls
Ingredients
- 2 cups crushed Butterfinger candy bars
- 1 cup creamy peanut butter
- 1 cup powdered sugar
- 4 tbsp softened butter
- 2 cups semi-sweet chocolate chips
- 1 tbsp shortening (optional)
Instructions
- In a medium bowl, combine crushed Butterfingers, peanut butter, powdered sugar, and softened butter. Mix until smooth and well blended.
- Roll the mixture into 1-inch balls and place them on a parchment-lined baking sheet.
- Freeze for 30 minutes to firm them up for dipping.
- In a microwave-safe bowl, melt the chocolate chips and shortening in 30-second intervals, stirring after each until smooth.
- Dip each ball into melted chocolate, let excess drip off, and place back on parchment paper.
- Chill until set. Store in an airtight container in the refrigerator.
Final Thoughts
These Butterfinger Balls are the ultimate no-bake dessert—quick, fun, and downright addictive. With their peanut butter filling, bits of crispy candy, and smooth chocolate shell, they’re a hit at every gathering. Make a batch today and see why everyone who tries them can’t stop at just one!
Whether you’re looking for an easy holiday treat, a crowd-pleasing party snack, or a freezer-friendly dessert, Butterfinger Balls check all the boxes. So grab your mixing bowl, crush some candy bars, and let’s make magic happen—one sweet, chocolatey bite at a time!