
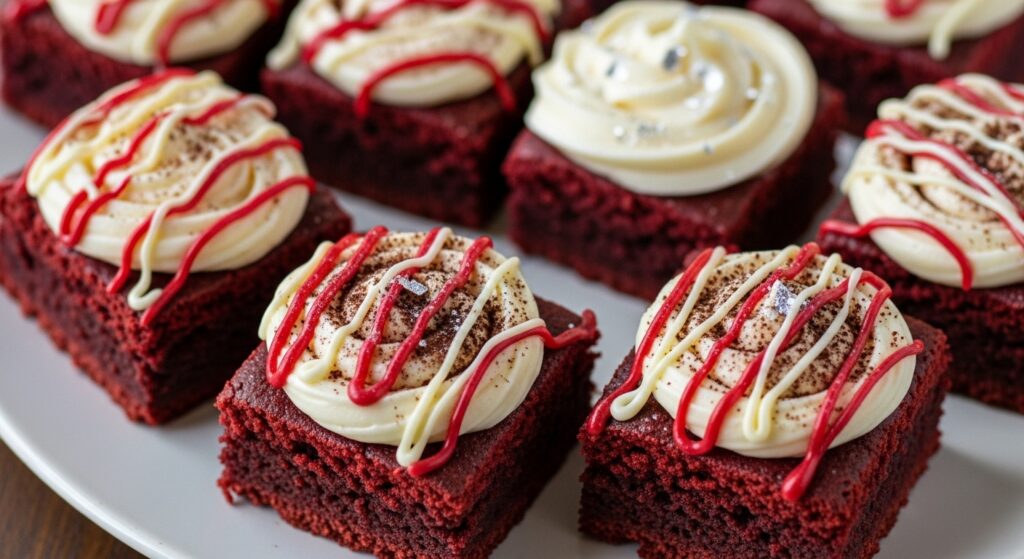
If you’re looking for a dessert that is rich, fudgy, and irresistibly vibrant, these Red Velvet Brownies are the perfect choice. With a luscious red hue, decadent chocolate flavor, and a chewy, moist texture, they’re everything you love about brownies—with a red velvet twist. Topped with a velvety cream cheese frosting, these brownies are the ultimate treat for holidays, celebrations, or cozy nights in. Whether you’re baking for Valentine’s Day, Christmas, or just a sweet craving, this easy red velvet brownie recipe will become a go-to in your dessert rotation.
Why You’ll Love These Red Velvet Brownies
- Fudgy and Chewy Texture: Thanks to the perfect ratio of fat to flour, plus a secret ingredient (cornstarch), these brownies strike the ideal balance between chewy edges and gooey centers.
- Classic Red Velvet Flavor: A hint of cocoa, a splash of vinegar, and vibrant food coloring give these brownies their signature red velvet profile.
- Easy to Make: No mixer needed—just a bowl, a whisk, and simple pantry staples.
- Perfect for Celebrations: Their eye-catching color makes them ideal for parties, gifts, or festive occasions.
- Customizable: Add white chocolate chips, nuts, or swirl in cream cheese for variations.
Ingredients You’ll Need
Each ingredient plays an important role in delivering the signature taste and texture of these red velvet brownies. Here’s what you need to gather:
- Butter: Unsalted, melted. Adds richness and depth.
- White Sugar: Fine caster sugar dissolves easily and sweetens the base.
- Light Brown Sugar: Adds a molasses undertone and extra moisture.
- Eggs + Egg Yolk: The combination ensures richness and chewiness.
- Vanilla Extract or Paste: Boosts the overall flavor profile.
- Vegetable Oil: Keeps the brownies soft and moist even after cooling.
- Dutch-Processed Cocoa Powder: Provides a smoother, more balanced chocolate flavor without excess bitterness.
- All-Purpose Flour: Measured accurately using the spoon-and-level method for best texture.
- Cornstarch: Secret weapon for achieving that tender chew.
- Vinegar: Adds the subtle tang that defines red velvet.
- Red Gel Food Coloring: For that bold, deep red color without thinning out the batter.
- White Chocolate Chips (Optional): Sweet pops of flavor that complement the cocoa base.
- Cream Cheese & Powdered Sugar: For the creamy, dreamy frosting.
Red Velvet Brownies: Step-by-Step Instructions
Let’s walk through how to make these stunning and scrumptious red velvet brownies from scratch.
Step 1: Prep Your Pan and Oven
- Preheat your oven to 350°F (180°C).
- Line an 8-inch square baking pan with parchment paper, allowing overhang for easy removal.
Step 2: Melt the Butter
- Melt the butter in a microwave-safe bowl in 30-second bursts until completely melted. Set aside to cool slightly.
Step 3: Combine Sugars and Butter
- In a large mixing bowl, whisk together the melted butter, white sugar, and light brown sugar until smooth.
Step 4: Add Eggs and Vanilla
- Add in the two large eggs, one extra yolk, and vanilla extract. Whisk gently until just incorporated.
Step 5: Stir in Cocoa and Oil
- Add the vegetable oil and cocoa powder. Stir until the mixture is smooth and well-blended.
Step 6: Add the Food Coloring
- In a small bowl, mix a few tablespoons of the batter with your red gel food coloring.
- Stir this colored batter back into the main bowl to evenly distribute the vibrant red hue.
Step 7: Mix in the Dry Ingredients
- Sift together the flour, cornstarch, and a pinch of salt.
- Gently fold the dry ingredients into the batter using a spatula. Be careful not to overmix.
Step 8: Add Vinegar and Chips
- Stir in the vinegar to activate the red velvet’s signature flavor.
- Optional: Fold in white chocolate chips for extra sweetness.
Step 9: Bake
- Spread the batter evenly in the prepared pan.
- Bake for 20–25 minutes, or until the top is set and a toothpick inserted in the center comes out with moist crumbs (not wet batter).
Step 10: Cool and Frost
- Let the brownies cool in the pan for at least 1 hour.
- Once set, transfer to a wire rack to cool completely before frosting and slicing.
Make the Cream Cheese Frosting
This creamy topping adds a tangy, sweet contrast to the rich red velvet base.
Ingredients for Frosting:
- 4 oz (115g) cream cheese, softened
- 2 tbsp butter, softened
- 1 cup powdered sugar
- 1/2 tsp vanilla extract
Instructions:
- Beat the cream cheese and butter together until smooth and fluffy.
- Gradually add the powdered sugar and vanilla extract. Beat until creamy and spreadable.
- Spread over completely cooled brownies. Chill slightly before slicing for neat squares.
Tips for the Best Red Velvet Brownies
- Use gel food coloring: It gives intense color without thinning the batter.
- Don’t overmix: Once you add the flour, fold just until combined to avoid tough brownies.
- Measure flour correctly: Spoon it into the measuring cup and level it off. Too much flour = cakey texture.
- Watch the bake time: Take them out when a few moist crumbs stick to a toothpick—don’t wait for a clean toothpick.
- Cool completely before frosting: Otherwise, the frosting will melt into the brownies.
Variations and Add-Ins
- Swirl in cheesecake batter before baking for a marbled look and added tang.
- Add chopped nuts like pecans or walnuts for crunch.
- Make it spicy: Add a pinch of cinnamon or cayenne for a subtle heat.
- Top with ganache instead of cream cheese for a double-chocolate dream.
Serving Suggestions
These red velvet brownies are rich and flavorful enough to serve alone, but here are a few ways to level up your presentation:
- Top each square with a fresh raspberry or strawberry.
- Serve warm with a scoop of vanilla ice cream.
- Dust with cocoa or powdered sugar for a festive look.
- Drizzle with melted white or dark chocolate.
Storage and Make-Ahead Tips
- Room Temperature: Store unfrosted brownies in an airtight container for up to 4 days.
- Refrigerated: Frosted brownies can be kept in the fridge for 5–7 days. Bring to room temp before serving for best texture.
- Freezing: Freeze brownies (frosted or unfrosted) wrapped tightly for up to 3 months. Thaw overnight in the fridge.
Frequently Asked Questions
Can I double the recipe?
Yes! Double all ingredients and bake in a 9×13-inch pan. You may need to increase baking time by 5–10 minutes—watch the center for doneness.
Why do red velvet brownies need vinegar?
Vinegar enhances the tangy flavor and interacts with the baking soda (if used) to create tenderness. In this case, it helps deepen the red color and balance the sweetness.
Can I use natural cocoa instead of Dutch-processed?
Technically, yes—but the flavor will be more bitter and the texture may vary slightly. Dutch-processed cocoa is smoother and works best in this recipe.
What type of red coloring is best?
Gel-based food coloring offers the richest color with the smallest amount. Liquid food coloring may not provide enough intensity and can thin out your batter.
How can I tell when they’re done?
The top should look set and slightly cracked. A toothpick inserted should come out with a few moist crumbs—if it’s clean, they may be overbaked.
Nutrition Facts (Per Serving)
- Calories: 310 kcal
- Carbohydrates: 36g
- Protein: 3g
- Fat: 17g
- Saturated Fat: 8g
- Cholesterol: 60mg
- Sodium: 75mg
- Sugar: 26g
Final Thoughts
These Red Velvet Brownies are more than just a dessert—they’re a show-stopping treat that brings together the best of both worlds: the richness of chocolate and the elegance of red velvet. With their deep red color, tender crumb, and optional cream cheese frosting, they’re guaranteed to impress. Whether you’re baking for a holiday, sharing with friends, or treating yourself, this recipe delivers bold flavor and beautiful results every time.
Go ahead, whip up a batch, and let your taste buds fall in love with this rich, fudgy, and vibrant red velvet brownie recipe. Happy baking! ❤️